Yottaa Integration for Shopify
To integrate Yottaa to optimize your Shopify site and monitor its performance, you must:
-
Install Yottaa on your site.
-
Create a Shopify custom pixel and connect it to Yottaa, to enable Yottaa’s RUM tracking on Shopify Storefront's checkout flow.
The following instructions are compatible only with library version 8.2.0 or newer.
To install Yottaa on your site:
-
You need Yottaa login credentials.
-
You need to install a Yottaa script tag in your site code.
Get Yottaa Login Credentials
For new installations, you will need the new username and password you received from Yottaa. When a Yottaa sales engineer creates an account for your company in our database, the system sends you an email with a username and password.
| Library |
How You Get a Yottaa Login |
|---|---|
| Monitor |
Go to YottaaInsights, enter your name, corporate email, and other details, and click APPLY. Yottaa sends you an email with an Insights login. |
| Optimize or Protect |
Contact Yottaa Sales at sales@yottaa.com or call (877) 767-0154 |
Yottaa works with any web browser, but you need Google Chrome to complete these steps. You can download Chrome on the Chrome website.
Insert the Yottaa Script Tag at the Top of Your Page Code
To install Yottaa for the first time:
-
In a Chrome browser window, enter one of these URLs to launch the Yottaa installation procedure:
To install Insights: rapid.yottaa.com/getstarted
To install Standard or Premium: rapid.yottaa.com
-
Enter your username in the Sign In window and click NEXT. See the table above for how to get Yottaa login credentials.
-
Enter your password and click SIGN IN.
-
Read the Terms and Conditions. Click AGREE to continue.
-
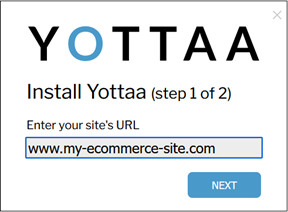
Enter your website's URL and click NEXT.

-
Click COPY to copy the code in the blue box.

-
Paste the copied code into every page of your site's source code in the <head> section, immediately after the opening <head> tag.
For Yottaa to work properly, the Yottaa code must appear before the Yottaa configuration file and before any other third-party code. The code contains a single <script> tag that installs Yottaa in your shopper's browser so that Yottaa can optimize your page.
-
Click NEXT.
You're almost done. Be sure you have pasted the copied code at the beginning of every page of your site's source code.
-
Click FINISH.

To enable Yottaa's Checkout Extensibility capability in Shopify, you must create a custom pixel. This section explains the steps.
To create a custom pixel within Shopify Admin:
-
Log into Shopify Admin.
-
Select the storefront where you wish to install Yottaa’s Checkout Extensibility capability.
-
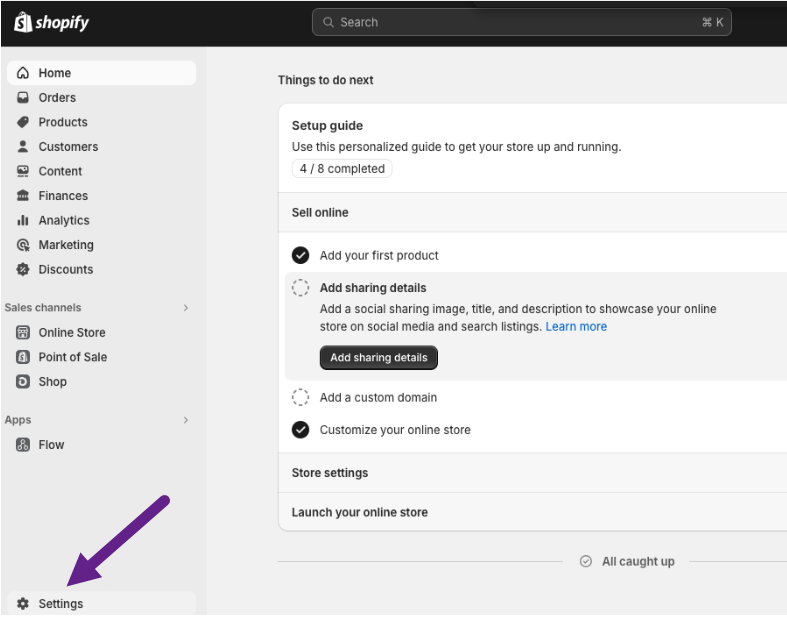
At the lower left, click Settings.

-
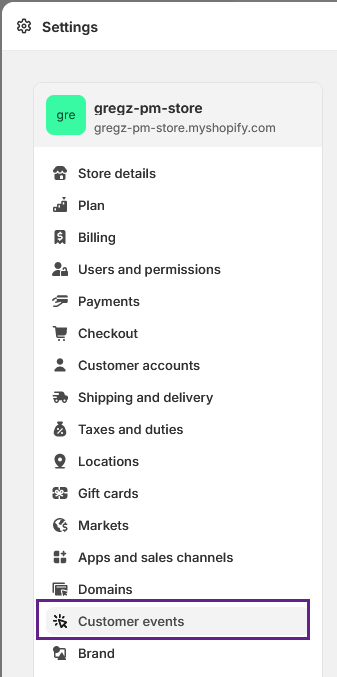
At the lower left under Store details, click Customer events.

-
At the upper right, click Add Custom Pixel.
The Add custom pixel pop-up displays.
-
Name the pixel Yottaa and click Add pixel.

-
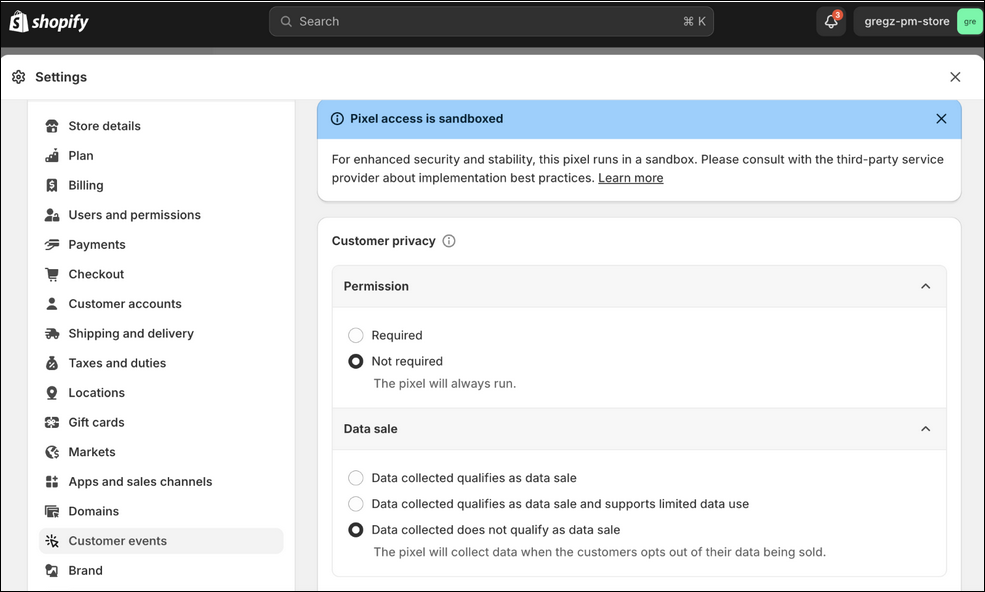
In the Customer Privacy section, under Permission, select Not required. Under Data sale, select Data collected does not qualify as data sale.

Yottaa never collects or stores personal information.
-
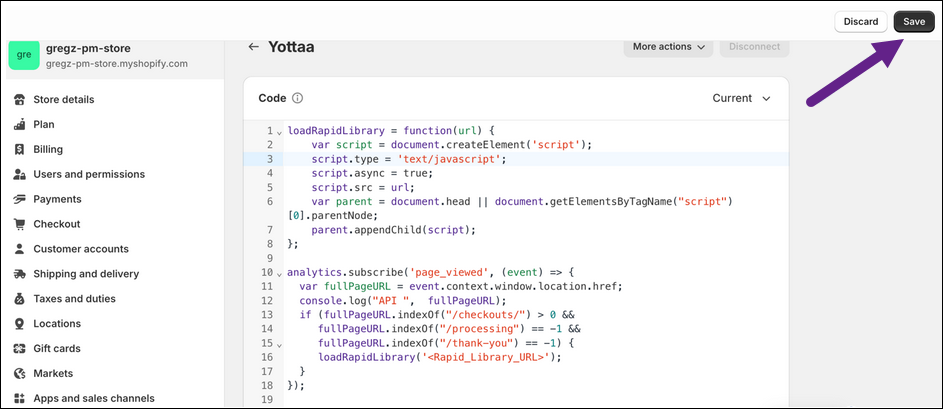
Copy the code below and paste it into the code text field.
Copylet loadRapidLibrary = function(url) {
const rapidScript = document.createElement('script');
rapidScript.type = 'text/javascript';
rapidScript.async = true;
rapidScript.src = url;
rapidScript.onload = function () {
Yo.rum.trackShopifyCheckout && Yo.rum.trackShopifyCheckout(analytics);
};
const parent = document.head || document.getElementsByTagName("script")[0].parentNode;
parent.appendChild(rapidScript);
}
analytics.subscribe("page_viewed", event => {
const pathname = event.context.window.location.pathname;
if (pathname.match(/^\/checkouts\/(?!(.*\/)?processing)/)) {
loadRapidLibrary('https://rapid-cdn.yottaa.com/rapid/lib/YOUR_SITE_KEY.js');
(loadRapidLibrary = function() {});
}
}); -
Be sure to insert your site’s Yottaa key to replace
YOUR_SITE_KEYin the next-to-last line of code. -
Click Save.

When you click Save, Shopify displays an expected warning:
"Pixel will not track any customer behavior because it is not subscribed to any events".
You can ignore the warning. Because you are implementing the Yottaa integration with these steps, tracking of custom events will occur in Yottaa’s portal configuration rather than in Shopify.
-
Connect the Yottaa Pixel to your Shopify storefront:
Click Connect at the top of the window. Then click Connect again in the pop-up that displays:

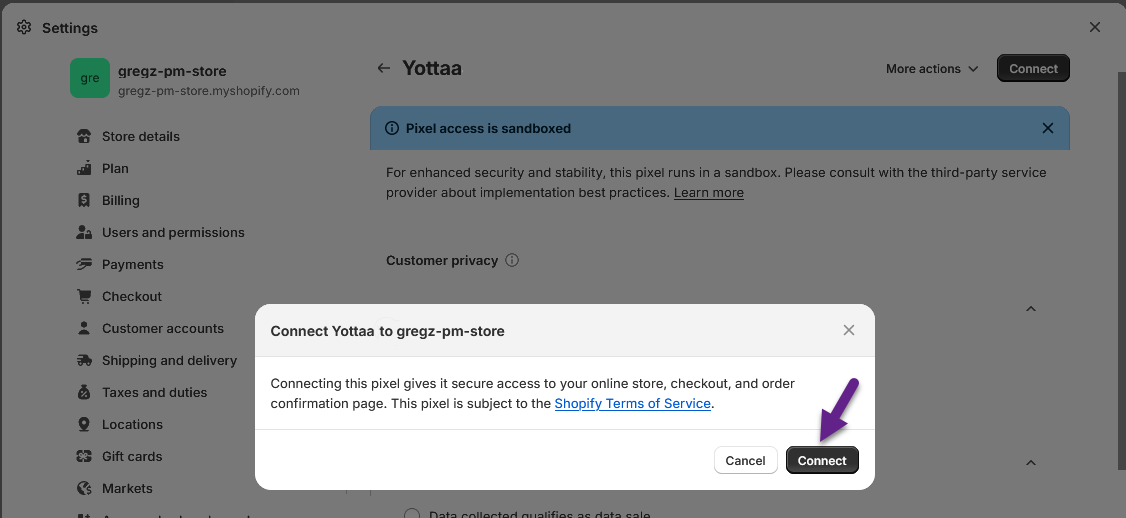
Yottaa is now installed on your Shopify storefront, and is ready to run.